Sidebar
This is an old revision of the document!
Table of Contents
Setting up File Sharing in X2GoClient
fuse group on your server. Newer distributions do away with this requirement. So if your server does not have a group called fuse, you should not need to create (and populate) it. Only populate it with your users if it already exists, to avoid Cargo Cult Programming.
The following screenshots were made using X2GoClient for Windows 4.0.5.1-2016.08.18. The design of the session tabs may vary slightly in later versions, however, the principle stays the same.
Session Setup
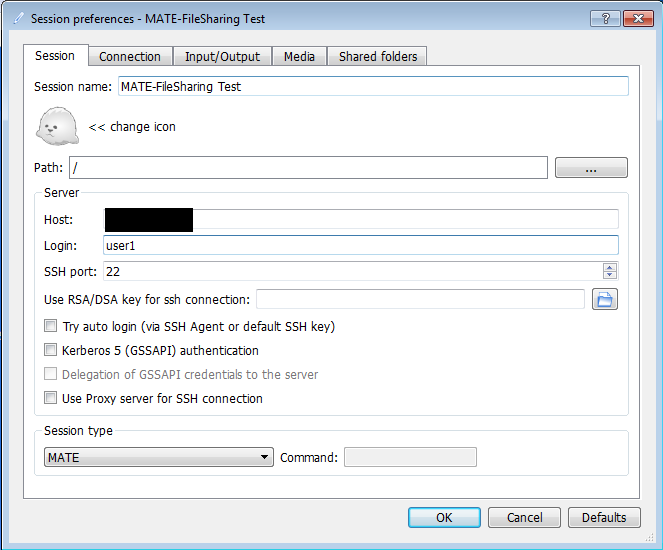
First, let's create a New Session
For this example, we'll be using MATE as Desktop Environment (see List of supported Desktop Environments). Feel free to use any other of the supported DEs, or Published Application/Single Application mode.
Adding Shared Folders
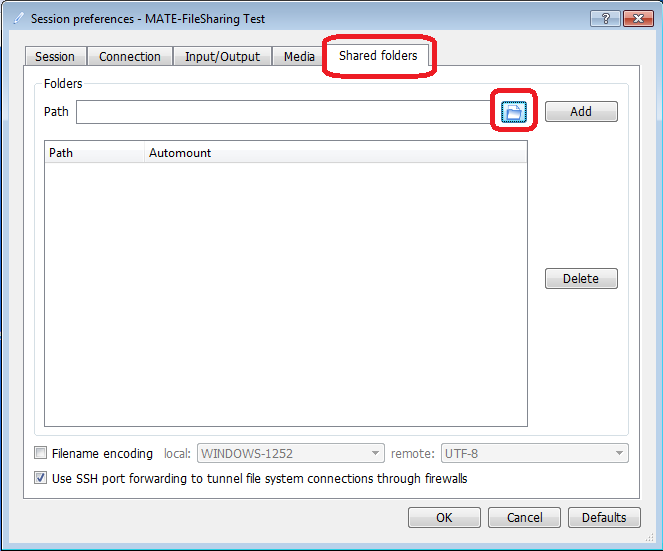
Go to the "Shared Folders" tab and Click on the Folder Icon
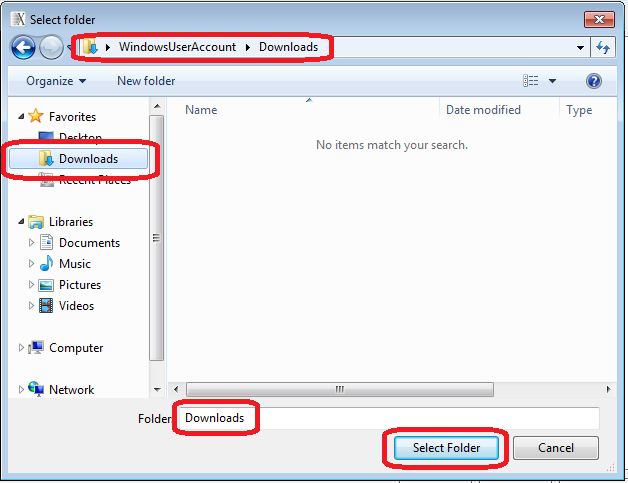
Navigate to the Folder you Wish to Add
For this example, we'll be using the Downloads folder of the Windows user account named WindowsUserAccount, located at C:\Users\WindowsUserAccount\Downloads.
Feel free to use any other folder that your local Windows user account has access to.
Click Select Folder to confirm your selection.
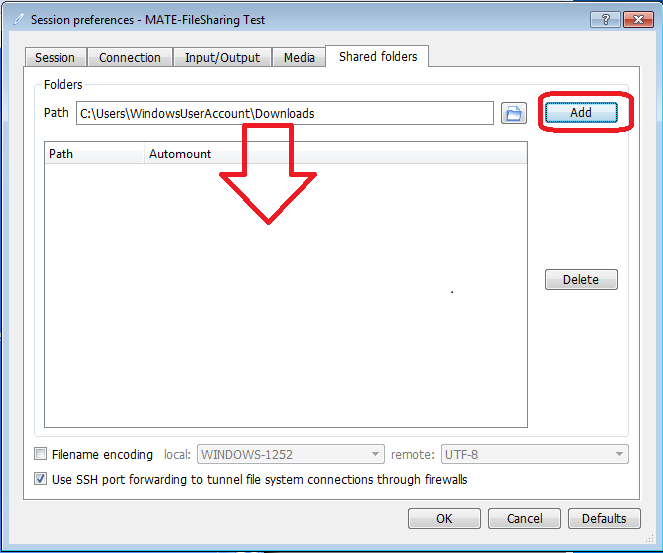
Add the Selected Folder to the List of Available Shares
If you've ever used PuTTY and its port forwarding feature, this step might already be familiar to you.
You need to add the folder you just selected to the list of available shares (the large, empty field that the red arrow points to).
Do this by clicking the Add button.
Use Automount and Port Forwarding
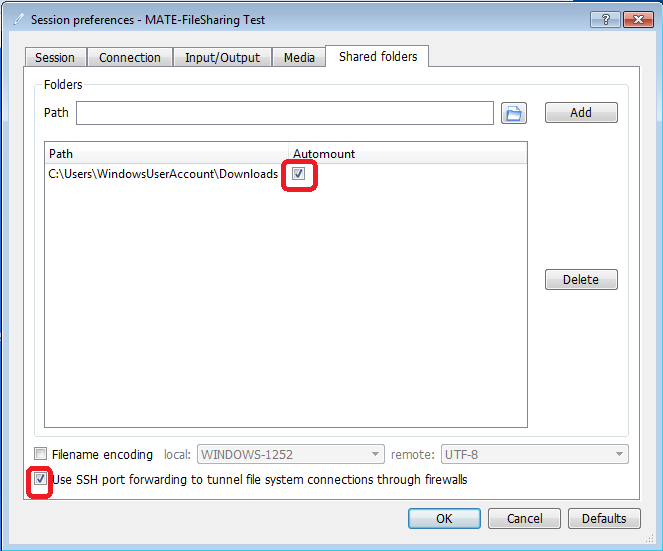
Make sure you've checked the Automount checkbox as well as the one that says Use SSH port forwarding…. The latter should be enabled by default.
Optionally activate Filename Charset Translation
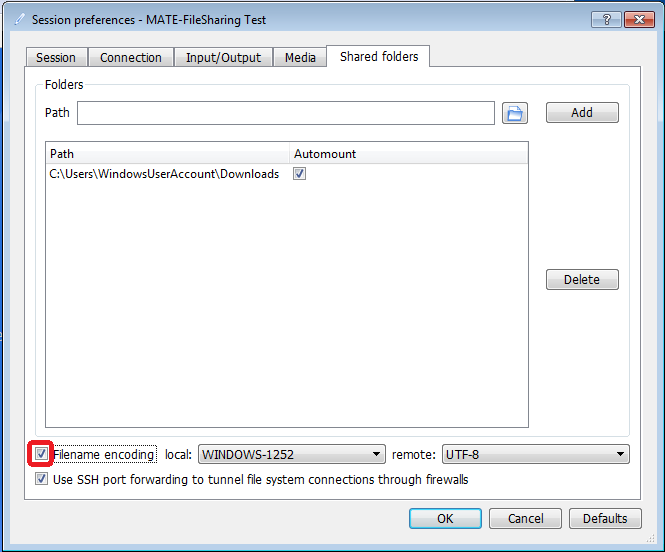
Unless you're using the same charset on both the Windows client and the Linux server, you should check this box so filenames with special characters in them don't get mangled.
Running the Session
Navigate to your Home Directory
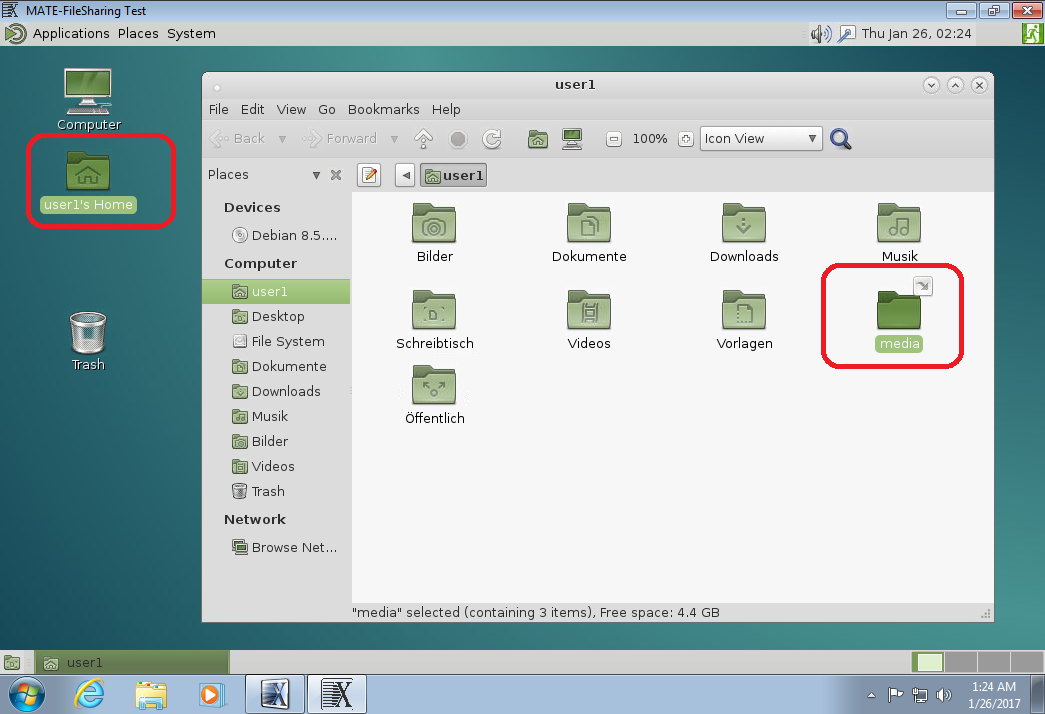
Once you're connected, you should see a symlink media in your home directory, assuming you followed our suggestion to use the Automount feature. Follow that symlink.
Locate your Shared Folders
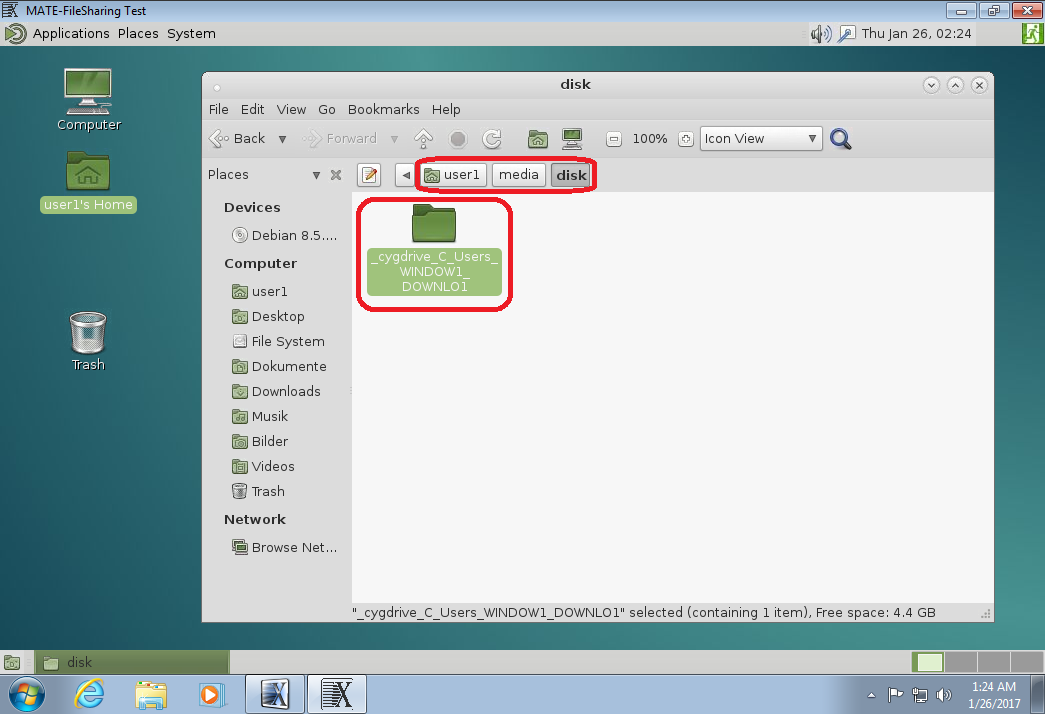
Inside the media folder are several sub-folders, one of them is named disk. Navigate there.
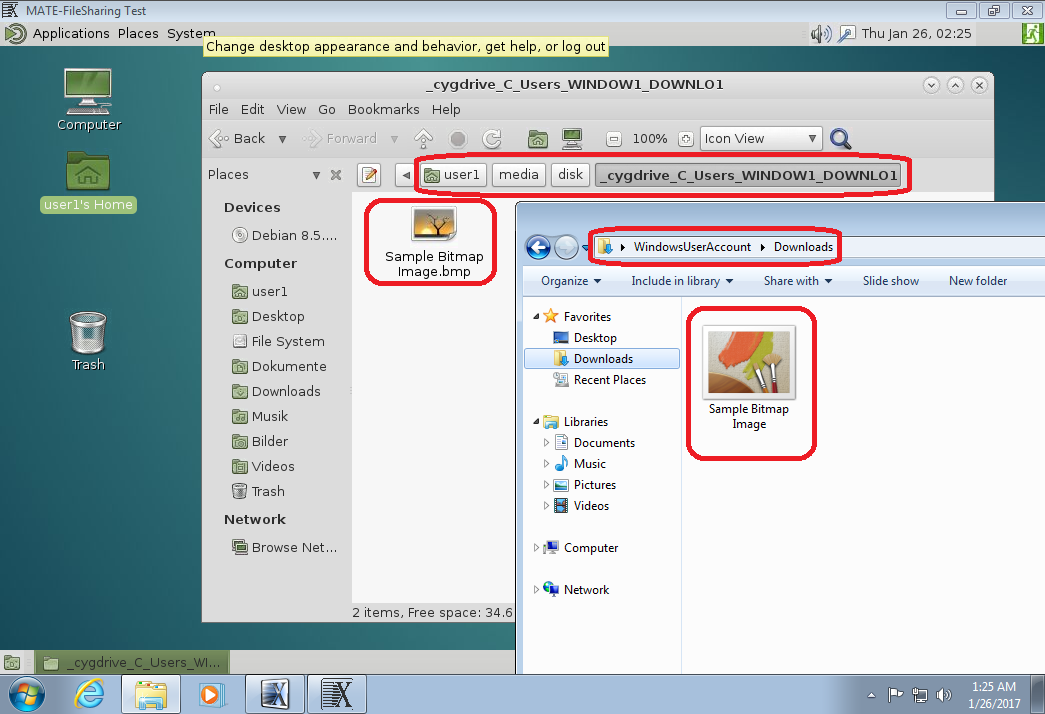
Inside the disk folder, you will see every mounted shared folder, the name always starting with _cygdrive_. Note that folder names are abbreviated, so in our example, C:\Users\WindowsUserAccount\Downloads becomes _cygdrive_C_Users_WINDOW1_DOWNLO1.
Compare Folder Contents
You can now navigate to one of the shared folders and access it like it was a local folder. All changes will be replicated instantly. Note that on the Linux side, you will always see file extensions (like .bmp in our example) as well as files that may be present, but hidden from you due to system settings on the Windows side. This behavior can be changed on the Windows side and is not specific to X2Go. Default behavior of Windows is to hide known file extensions as well as entire files with file system attributes hidden and/or system.
Manually mounting Shared Folders on Demand
If you've decided against using the Automount feature, you will need to mount the Shared Folder(s) manually before you can use them.
How you mount them manually depends on what checkboxes you checked under
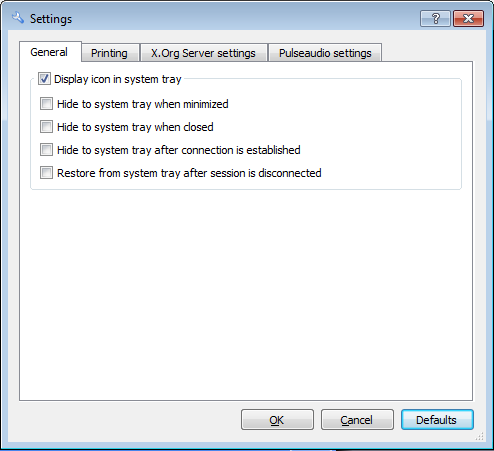
Options/Settings/General in X2GoClient:
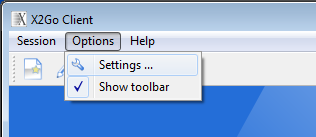
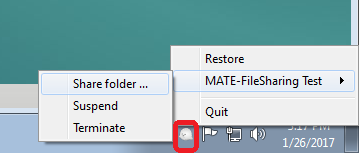
If you set X2GoClient to minimize into the system tray (any of the Hide… options in the screenshot above), then:
Right-click the session icon next to the clock, select the session name (in our example: MATE-FileSharing test), then Share folder ….
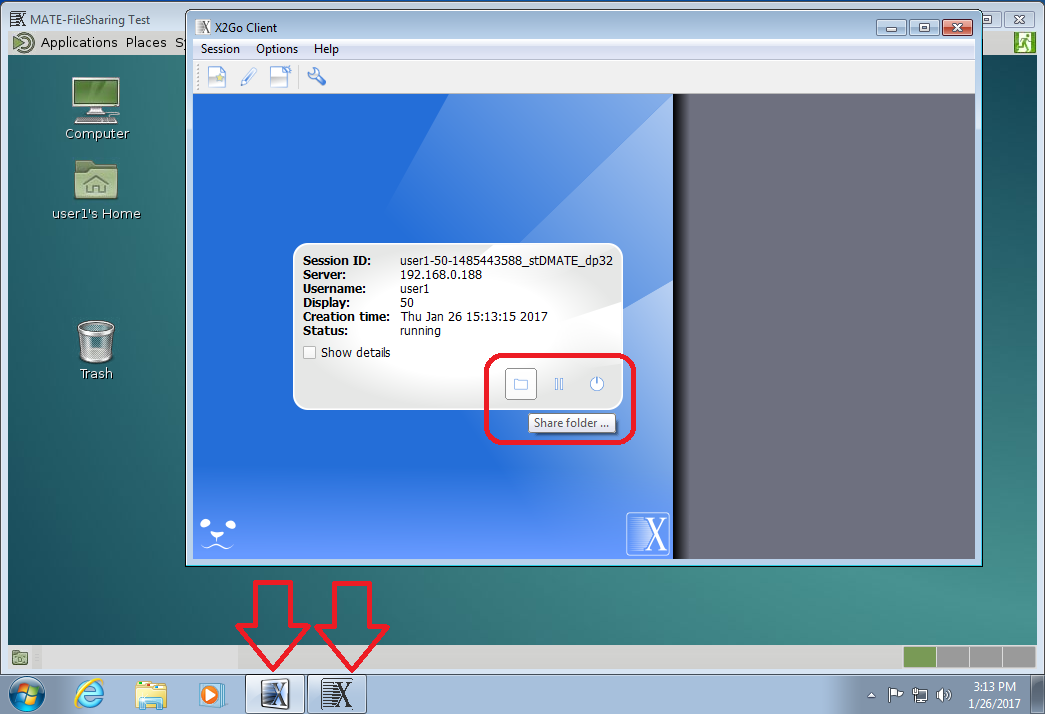
If, instead, you have the X2GoClient window on your screen even with an active connection (noticeable by the two X2Go-related items in your taskbar, as highlighted by the two red arrows in the screenshot), click on the small folder icon, that's the left of the three icons Folder, Pause, Power marked in the red box in the screenshot.
From there, the steps are the same again for both variants:
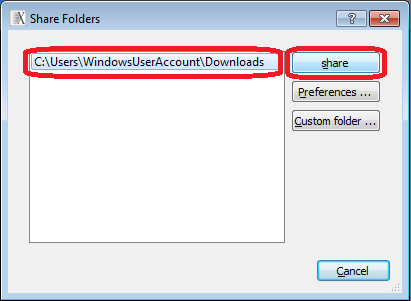
Click the name of the share (in our example: C:\Users\WindowsUserAccount\Downloads) in the window that has opened, then click the share button to confirm your selection.

